Well, I’m going to dive in and try blogging… again. While this blog is specific to my experiences in the SCA, it is not an official SCA blog. Everything here is just my thoughts, my experiences, and my two-cents. Take it for what it’s worth. You are welcome to link to here or ignore my blog. Mostly, this is a place for me to brain-dump. Sometimes it will be information people keep asking me about, sometimes it will be my ramblings, and often it will be information about my projects. So, dear reader, it is up to you is you wish to stay or go. Either way, I wish you joy and happiness in your life’s endeavors and I look forward to seeing you at SCA events.
Weaving Adventures – Warping Trapeze
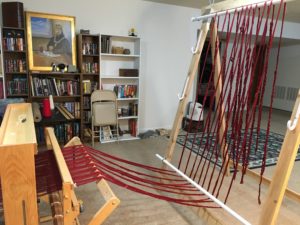
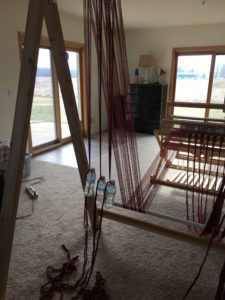
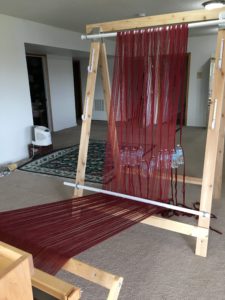
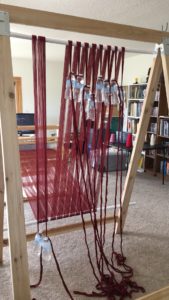
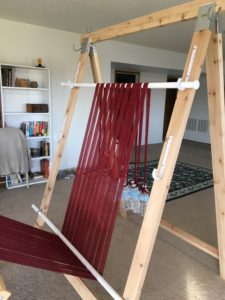
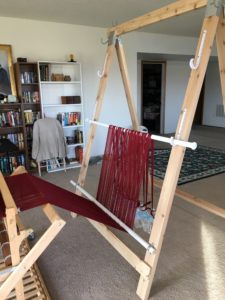
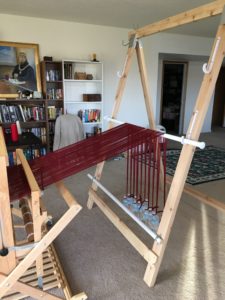
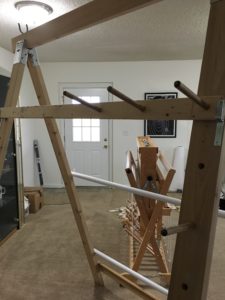
After my first weaving project, where I ended up warping the loom again by tossing the warp over the bannister and weighting the warp with water bottles, I needed a new weighting option after moving the loom to the lower level of the house before the second project.
After doing some searching online, I found people using something called a warping trapeze. Brilliant.
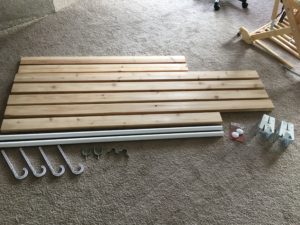
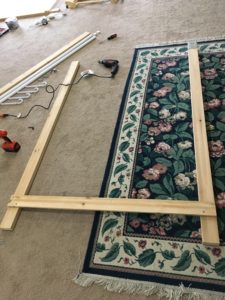
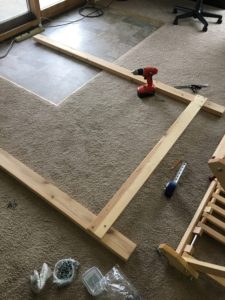
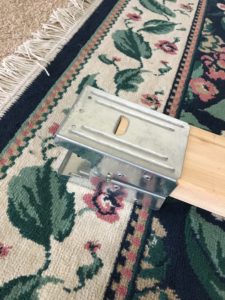
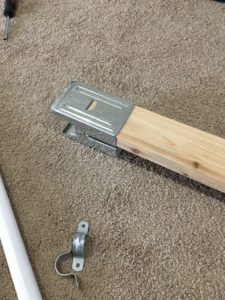
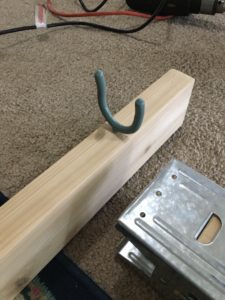
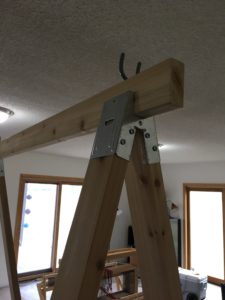
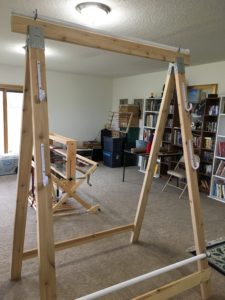
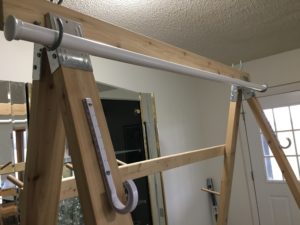
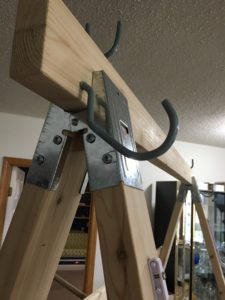
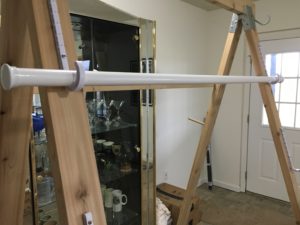
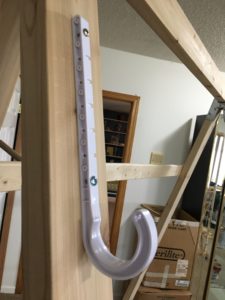
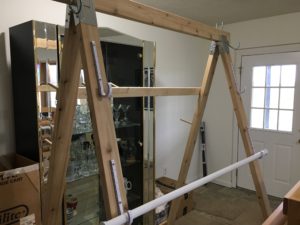
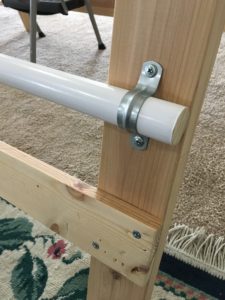
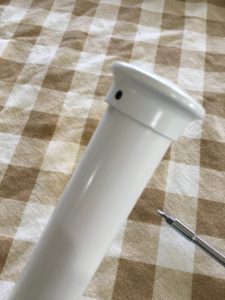
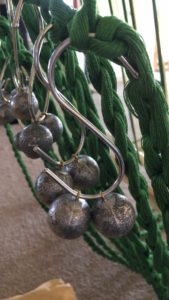
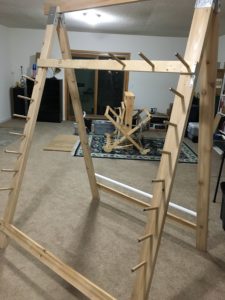
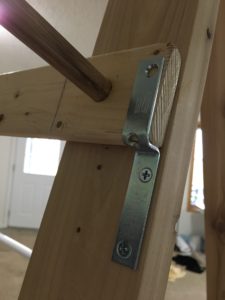
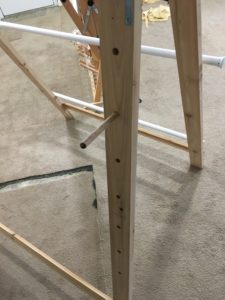
However, I wanted my warping trapeze design to be a little different. I’m not going to walk through how to actually build a warping trapeze but I’m showing several pictures of how we build mine and why we chose some of the design features.
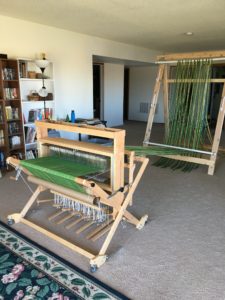
A Gallery of Pictures of My Warping Trapeze
Weaving Adventures – Project 4 – Planning
The new fibers for weaving project #4 arrived today!
The goal for this experiment:
- Garment-weight cloth
- Fill the full-width of my 20-dent reed (had to order more heddles)
- Silk warp and wool weft
- Unbalanced twill
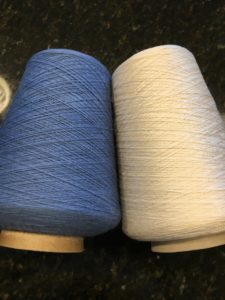 I ordered silk and wool from Halcyon Yarn. I ordered a white 2/30 silk for the warp and a “French Blue” 2/20 wool for the weft.
I’m only going to weave a couple of yards for this experiment. It’ll be enough to do something small, like maybe a hood to wear with my cotehardies.
With the silk being finer than the wool, the cloth will be more wool-like than silk-like.
This one will still be a twill. I think I’d like to do an unbalanced twill this time. That way I could have either side of the hood be a little different color.
Planning the Warp
With this experiment, I had to order specific fibers instead of digging in to my stash of fibers.
I also had to do the math to figure out exactly how much fiber to order.
I pulled out my weaving books to find a formula for planning the amount of fiber.
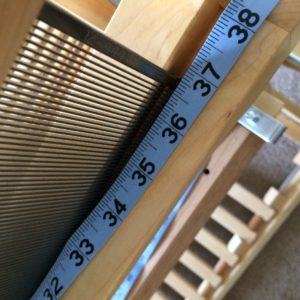
My reeds are about 37″ wide. To be safe, I assume I can use 36″ of it. Using my 20-dent reed at 2-ends-per-dent across the 36″ equals 1440 ends.
20 x 36 x 2 = 1440 (had to order more heddles with the fiber)
- If I plan two yards of a finished woven length, that is 72″
- Assume approximately 5% shrinkage: ~4″
- Assume approximately 10% takeup: ~7″
- That equals approximately 83 inches of warp length to get to the finished woven length
- Assume approximately a yard of waste (I’m getting better at waste but I assumed a yard for my math)
- Now I’m up to 119″ (3.3 yards) of measured warp (and I can do a 3.3 yard path on my warping frame)
3.3 yards warp length x 1440 warp ends = 4752 yards of warp fiber.
The silk I picked out has 7200 yards per pound. I need 0.63 pounds. Based on how the silk is sold, I had to buy a full pound cone.
Planning the Weft
I’m planning on a 36″ wide cloth. Of course, there is likely to be some draw-in but I need to plan for getting better at weaving and draw-in being minimized as I work on these projects. So, assume I can create that full 36″ width.
Based on information at the website, I can get about 40 shots per inch of the wool.
36 x 40 = 1440″ of fiber per inch of woven cloth
Multiply that by the project length + shrinkage and divide by 36 to get the number of yards of fiber I need for the weft.
Result is 3040 yards.
The weft I picked out is 5600 yards/pound.
Again, I had to bought a full pound of the weft fiber.
I love this adventure!
Weaving Adventures – Project 3 – Garb: Burgundian Cutting
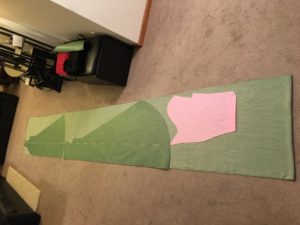
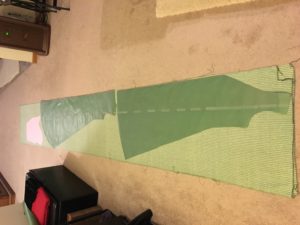
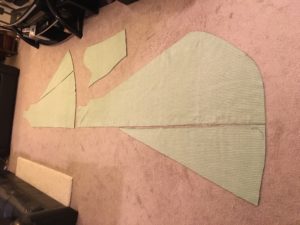
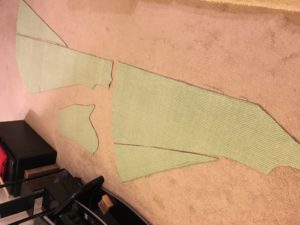
I did it. I cut the fabric for this weaving project. 🙂
And, before you ask, no, I did not have any cutting anxiety for this. I am not entirely positive *why* I don’t have cutting anxiety. I think if I had bought the fabric, I might. But, this is kind of “free” because I bought these fibers sometime in the late 1990s. They’re in my fiber stash and have been taking up space ever since. While, yes, this is handwoven cloth and I spent hours weaving it, I didn’t have any issues cutting it. It’s all part of the experiments leading up to my end goal project.
Anyway, there was enough fabric in this weaving project for this dress to have a little bit of a train. Because of the narrow width of the fabric, I am planning to place gores in the front and the back.
I have a little bit of fabric left over that I can probably make a matching pouch.
Weaving Adventures – Project 3 – Garb: Burgundian Patterning
At some point during the weaving process, I started searching the Internet for illuminations showing medieval clothing with vertical stripes.
When I found this, I started leaning toward trying to make this particular garment (http://gallica.bnf.fr/ark:/12148/btv1b10515437z/f171.item). I mean, why not. It’s green with some pinstripes. The illumination looks like the stripes are a darker color like a brown or a burgundy and a light color like white or yellow.
Close enough for me. 🙂
Patterning
To do a pattern for a Burgundian gown,  I started with my 4-piece cotehardie.
This picture is the front piece of my 4-piece cotehardie pattern.
I turned back the neckline to plan for the deep V, bringing it down to the bottom of the bustline.
I transferred the current pattern to paper. Then, instead of following the curves toward my waistline, I went straight down from the armpit to the hip and angled out to the width of the fabric. Click on the image to see it better.
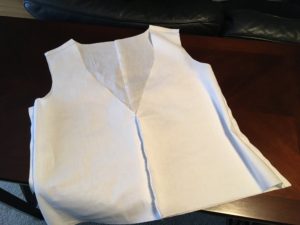 I then mocked it up in fabric and stitched it together so I could test to see if I could pull it over my head.
Success!
Next step will be to lay it out on the handwoven fabric, taking into account that I will add a band around the bottom to match the collar and cuffs, gores, and maybe enough for a little bit of a train.
Weaving Adventures – Project 3 – Weaving
- Started weaving on March 4, 2017.
- Completed weaving on March 19, 2017
- Measured warp: 12 yards
- Width in the reed: 29″
- Final woven length: 10 yards, 4″
- Final woven width: 28″
- Washed length: 9 yards, 29″
- Washed width: 26″
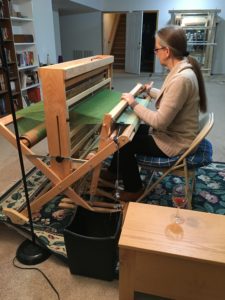
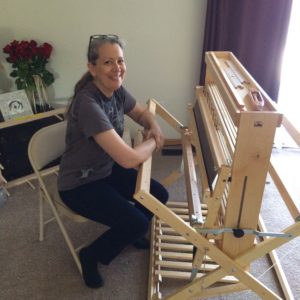
The picture of me at the loom was by request because someone wanted to see the size of my loom.
Video of me weaving – throwing the shuttle:
Weaving Adventures – Project 3 – Warping
Goals for this third project on my loom:
- Garment-weight cloth
- Twill weave
- Two different fibers
- Use my new 20-dent reed
Again, with this project, I dipped into my fiber stash. I selected a green 14/2 cotton for the warp. For the weft I chose a natural silk/wool blend that no longer has its label so I can’t be sure of the gauge. But, it’s very similar in size to the cotton.
My plan was to sley two ends per dent in the reed and, with the limit of how many heddles I have, I needed a total of 1152 warp ends. I also chose to do a longer warp than the previous warp. This time I made 12 yards of warp.
In the warp measuring process, I ran out of the green.
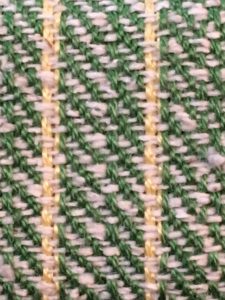
Time to change my plan a little. I added some yellow. The result was that I used three ends of yellow in every 16 ends, resulting in yellow pin stripes on the green.
I opened up the Fiberworks program to see what it might look like. I can live with that. It wasn’t my original plan, but, this is my adventure! Sometimes you have to make it up as you go. 🙂
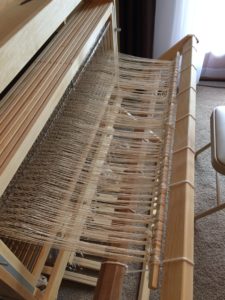
With this revised plan, I continued my warping. The following are a set of pictures to help show the progress.
I started measuring the warp on February 14, 2017, and completed the measuring on February 19, 2017.
I started warping the loom on February 19, 2017 and completed the warping on March 4, 2017.
Weaving Adventures – Project 1 – Rewarping
After I got all the warp wound on to the warp beam and started weaving, I was completely frustrated with how uneven the tension was. I needed a better solution.
I rotated my loom to face the banister. I unwound the whole warp and cut off the 4 inches that I had already woven. I hung the warp over the banister and tied sections of it to water bottles to get even tension across all the warp.
I rewound the entire warp and ended up with a very even tension for the rest of the project. Success!
Weaving Adventures – Project 1 – Putting on the Break-In Warp
The first warp for my new loom was a rug warp.
The warping frame I bought with the loom is a 9-yard frame. I measured out the full length on the frame.
The first warp was a heavy cotton that I got from my grandmother who had been using it to make rag rugs. It was also recommended by Schacht for helping to clean the manufacturing oils off of the reed.
I measured enough warp ends to fill the reed. The reed that came with the loom is a 12-dent reed. That means there are 12 slots per inch. It’s a 37″ reed which means it has 444 slots.
I filled most of the reed with one warp end per opening in the reed. I read instructions and watched videos for warping front-to-back and back-to-front and decided that front-to-back looked like it would be easiest for me.
Weaving Adventures – The New Loom
June 6, 2015
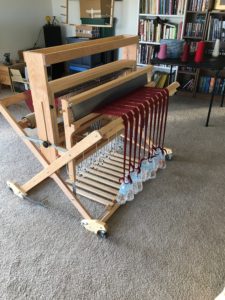
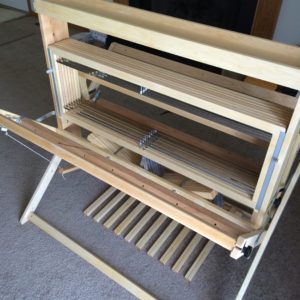
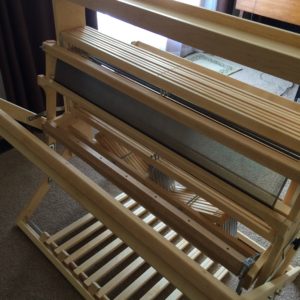
My new loom arrived at the weaving store. I ordered the Schacht Mighty Wolf with 8 harnesses and the stroller. It barely fit into the car (Ford Flex).
We got the loom home safely. I got it all set up, added the heddles to the harnesses and concluded with sitting with a big grin for the start of my weaving adventure.
Experiments in Natural Dyeing: Logwood
Gallery
Click thumbnail for large image. Mordant Dye 3 Tbsp alum dissolved in boiling water 2 gallons tap water Pre-wet the fibers. Add to mordant bath. Heat to just below a simmer. Stir frequently for half an hour. Turn off heat. … Continue reading
Experiments in Natural Dyeing: Purple Cabbage 2
Gallery
Linen Cotton Click thumbnails for large images. Mordant Dye 1 cup vinegar copper scouring pad – if new, pound the pad to crack the coating that keeps it from oxidizing in the store Soak for several weeks, then add: Alum … Continue reading
Experiments in Natural Dyeing: Hazelnut Hulls
Gallery
Linen Cotton Click thumbnails for large images. Mordant Dye 1 cup vinegar steel wool pad Soak for 4 hours. Strain. Add 1 Tbsp Cream of Tartar 3 cups hazelnut hulls 1/2 gallon water Boil for several hours, replenishing water as … Continue reading
Experiments in Natural Dyeing: Beets 2
Gallery
Linen Cotton Click thumbnails for large images. Mordant Dye 1/2c vinegar Steel wool pad Soak for 5 hours then remove pad. 12 Beets – root only – chopped 1/2 gallon water Boil until color leave beets. Remove beets. Add mordant … Continue reading
Experiments in Natural Dyeing: Beets
Gallery
Linen Cotton Click thumbnails for large images. Mordant Dye 1Tbsp Pickling Alum 1 Tbsp Cream of Tartar 1 cup warm water 12 Beets – root only – chopped 1/2 gallon water Boil until color leave beets. Remove beets. Add mordant … Continue reading
Experiments in Natural Dyeing: Turmeric
Gallery
Linen Cotton Click thumbnails for large images. Mordant Dye 1 Tbsp Pickling Alum 1 Tbsp Cream of Tartar 1/2 gallon tap water 25g (1 oz) ground turmeric Heat to light boil. Add mordant and fibers. Simmer 1/2 hour. Allow fibers … Continue reading
Experiments in Natural Dyeing: Purple Cabbage
Gallery
Linen Cotton Click thumbnails for large images. Mordant Dye 12 Tbsp Pickling Alum 1 tsp Cream of Tartar 1 cup boiling water 1 large purple cabbage, chopped 4 quarts water Boil for 1-1/2 hours, strain, then added water to bring … Continue reading
Experiments in Natural Dyeing: Pomegranates
Gallery
Linen Cotton Click thumbnails for large images. Mordant Dye 1 cup vinegar steel wool pad Soak for 4 hours. Strain. 8 pomegranates – pulp and shells 4 quarts water Boil for 1/2 hour, strain, then added water to bring total … Continue reading
What happens after I submit an award recommendation?
Gallery
There are no state secrets about how the award recommendation process works in this Kingdom but neither are there a binding set of rules that each Crown follows. This is written to pull back some of the curtains to help … Continue reading
Royalty is Coming to Your Event. Now What?! — Miscellaneous
Gallery
(This is a series of posts from a class I taught at R.U.M.) Retainers: Most of the time, the royalty will bring at least one set (two people) of retainers with them. These retainers are to be considered the “head” … Continue reading
Royalty is Coming to Your Event. Now What?! — Food
Gallery
(This is a series of posts from a class I taught at R.U.M.) Morning Food (Food in the royalty room when royalty arrive i.e. breakfast/brunch): It is usually very welcomed. Whether or not to provide food in the royalty room … Continue reading
Royalty is Coming to Your Event. Now What?! — Court
Gallery
(This is a series of posts from a class I taught at R.U.M.) Court Preparation Royalty will need to start preparing for court one to two hours before court. If one or both of them has been fighting, they will … Continue reading
Royalty is Coming to Your Event. Now What?! — The Presence
Gallery
(This is a series of posts from a class I taught at R.U.M.) Presence for the Day The royalty will need a place to set up “The Presence” during the day. If you are going to make an assumption, assume … Continue reading
Royalty is Coming to Your Event. Now What?! — The Royalty Room
Gallery
(This is a series of posts from a class I taught at R.U.M.) The first place the royalty will need to go when they arrive at your event is the Royalty Room. Royalty Room Location Preferably, it is close enough … Continue reading
Royalty is Coming to Your Event. Now What?! — Communications
Gallery
(This is a series of posts from a class I taught at R.U.M.) Your group is hosting an event and the autocrat receives a communication from Their Royal Majesties’ chamberlain informing you that TRMs will be attending your event. In … Continue reading

